Showing posts with label PC Tweaks. Show all posts

Make your Windows 7 Genuine Again

Posted by Narender Singh | 7:31 PM | , | 38 comments »

Now, i've just came up with what most of the people today are looking on the internet these days - "How to convert Pirated/OEM windows 7 copy into Genuine/Full version?"
After a lot of time on the internet i've found a very good software to do all the task for you, in just a minute and all for free.
It removes all sort of pop-ups you get - Before the welcome screen, After connecting to the internet, and after 5-10 minutes constantly after that.
You'll also get rid of that dark desktop, and you'll be able to use any of your walpaper, or one from the themes afet that. It'll remove everything related to windows activation.


Firefox + IDM + TCP Optimizer

Do a speed test of your net connection before & after at http://speedtest.net/ to know what difference this trick has made.


1) Speeding up firefox browser:


Way to longer Batery Life for your Laptop

Posted by Narender Singh | 11:06 AM | | 0 comments »

  • Don't Run It Down to Empty Squeezing every drop of juice out of a lithium ion battery (the type used in today's laptops) strains and weakens it. Doing this once or twice won't kill the battery, but the cumulative effect of frequently emptying your battery will shorten its lifespan.
    (There's actually an exception to this rule--a circumstance where you should run down the battery all the way. I'll get to that later.)
    The good news: You probably can't run down the battery, anyway--at least not without going to a lot of trouble to do so. Most modern laptops are designed to shut down before the battery is empty.
    In fact, Vista and Windows 7 come with a setting for just this purpose. To see it, click Start, type power, and select Power Options. Click any one of the Change plan settings links, then the Change advanced power settings link. In the resulting dialog box, scroll down to and expand the Battery option. Then expand Critical battery level. The setting will probably be about 5 percent, which is a good place to leave it.

    XP has no such native setting, although your laptop may have a vendor-supplied tool that does the same job.
    Myth: You should never recharge your battery all the way.


    2. Keep It Cool and Give It a Rest 
    Heat breaks down the battery, and reduces its overall life.
    When you use your laptop, make sure the vents are unblocked. Never work with the laptop on pillows or cushions. If possible, put it on a raised stand that allows for plenty of airflow.
    Also, clean the vents every so often with a can of compressed air. You can buy this for a few dollars at any computer store. Be sure to follow the directions on the can, and do this only when the notebook is off.
    If you're going to be working exclusively on AC power for a week or more, remove the battery first.
    Otherwise, you'll be wearing out the battery--constantly charging and discharging it--at a time when you don't need to use it at all. You're also heating it up (see "Keep It Cool," above).
    You don't want it too empty when you take it out. An unused battery loses power over time, and you don't want all the power to drain away, so remove it when it's at least half-charged.
    Never remove the battery while the computer is on, or even in standby or sleep mode; doing so will crash your system and possibly damage your hardware. Even inserting a battery into a running laptop can damage the system. So only remove or reinsert the battery when the laptop is completely off or hibernating.
    If you've never removed your laptop's battery and don't know how, check your documentation. (If you don't have it, you can probably find it online.) The instructions generally involve turning the laptop upside-down and holding down a button while you slide out the battery.
    Myth: Refrigerate your battery.
    Some people recommend you store it in the refrigerator, inside a plastic bag. While you should keep a battery cool, the last thing you want is a wet battery, and condensation is a real danger in the fridge. Instead, store it in a dry place at room temperature. A filing cabinet works fine.


    3.  Heal a Sick Battery
    Myth: You can rejuvenate a worn-out battery.
    This isn't, strictly speaking, the case. You can't make old lithium hold more electrons than it can currently manage.
    But if the battery is running out unexpectedly fast, or if your laptop is having trouble figuring out how much power it has left, you might be able to fix the battery's "gas gauge," so it at least gives a more accurate reading.
    If you suspect the battery can't tell if it's charged or not, run it through a couple of cycles. Drain it of all its power (yes, this is the exception to the "don't drain the battery" rule mentioned above), recharge it to 100 percent, and then repeat.
    But how do you drain the battery when Windows won't let you do just that? Don't bother with the settings described above. They're not safe (you might forget to change them back), they may not be getting an accurate reading, and they quite possibly won't let you set the critical battery level to 0 percent. (If they did, it would crash Windows.)
    Instead, unplug your AC power and keep your laptop running (you can work on it if you like) until it automatically hibernates. Then reboot your PC back and go directly to the system setup program.
    I can't tell you exactly how to get there; each computer is different. Turn on your PC and look for an onscreen message (one of the first you'll see) that says something like "Press the X key for setup." Immediately press the designated key.
    It may take a couple of times to get the timing right. If there isn't enough power to let it boot, plug in AC until you're at the setup program, then unplug it.
    Leave the notebook on until it shuts off. This can take some time (45 minutes on my laptop); setup uses a lot less power than Windows.
    Once the PC is off, plug in the AC power, then wait a few hours before rebooting to Windows and making sure you've got a full recharge.
    Repeat the process once or twice.
    With luck and proper care, your battery will still be useful when you're looking for a new laptop.


    4.  Longer Life Between Charges
     The tips above should lengthen the time before you need to replace your laptop's battery. But on a daily basis, we're far more concerned with another type of battery life: how long we can keep our laptop running without AC power. You may know most of the following tips already, but it never hurts to refresh (or recharge) your memory.

    Dim your screen: Your laptop's backlight requires a lot of juice. Keep it as dim as you can comfortably read it.

    Shut off unneeded hardware: Turn off your Bluetooth, and if you're not using the Internet, turn off your Wi-Fi receiver, as well. Don't use an external mouse or other device. And muting the PC's sound system not only saves power, it avoids annoying everyone else in the café.

    Avoid multitaskingRun as few programs as you can get away with. If possible, stick to the one application (word processor, browser, or whatever) you're currently using, plus your antivirus and firewall in the background. And if you're not on the Internet, you don't need those two.

    Avoid multimedia : Save chores like photo editing and watching old Daily Show videos for when you have AC power. And if you must listen to music, use your iPod (or similar device).

    Know when to sleep and when to hibernate: You need to think about when you want to save power by sending your laptop into Standby or Sleep mode, and when you want to hibernate it. There's a difference. XP's Standby and Vista and Windows 7's Sleep modes keep your PC on, using some power, but less of it than in normal use. Hibernate saves the PC's state to the hard drive, then shuts it off entirely, so that no power is used. On the other hand, Windows takes much longer--sometimes minutes--to go into and come out of hibernation. And those are minutes that the battery is draining heavily and you can't work. XP's Standby mode isn't really all that efficient. If your laptop will be inactive for more than about half an hour, hibernate it. Otherwise, use Standby. But Vista and Windows 7 do a much better job with their Sleep mode. Don't bother hibernating your PC unless you think you're going to go more than two or three hours without using it.


    Myth: Adding RAM saves battery life.

    True, more RAM means less hard drive access, and the hard drive uses a lot of electricity. But RAM uses electricity as well, and unless you're doing a lot of multitasking (not a good idea when you're on battery power), more RAM won't reduce hard drive use.


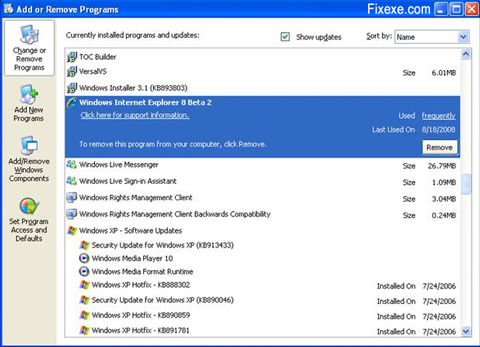
If you remove an installed program and its files by deleting the files, it may still show up in the Add/Remove programs list through the control panel. In order to remove it from the list (so you don ’t need to re-install in order to just
remove it again).

1. Start the Registry Editor by clicking RUN from start menu and entering ‘regedit’ without quotes.

2. Open HKEY_LOCAL_MACHINE / SOFTWARE / Microsoft / Windows / CurrentVersion / Uninstall

3. Delete any programs from the list.

This will only delete them from the list, not delete the actual programs. Only programs designed for Windows95 will show up here in the first place.

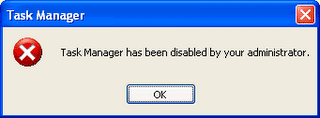
Are you shocked seeing this error message?

To do enable it automatically via Software. Download the softwares below and fix it


Task Manager Fix 1.0


or do it manually by yourself by our rescuing steps...

Rescuing Steps:

step1: Goto Start-> Run -> type "gpedit.msc" and click OK

Step2: Navigate to User Configuration -> Administrative Templates -> System -> Ctrl+Alt+Delete Options

Step3: Double click it on Remove Task Manager in the right-hand pane

Step4: Choose the option "Not Configured" and click Ok

Step5: Close the Group Policy Window
Result: Task manager is enabled...

How to Prevent a Data Disaster

A corrupted Outlook database trashes your e-mail archive and contact list. An accidentally deleted folder wipes out critical business documents. A sudden hard-drive failure destroys your MP3s and photo libraries. The list of potential catastrophes goes on and on, and few users are prepared to deal with them. That's because they lack a diversified backup plan.

From a certain point of view, data is a little like money. Financial advisors always recommend maintaining a diversified portfolio, the idea being that if one stock or mutual fund tanks, you won't go broke. The same concept applies to backups: By diversifying your approach--that is, archiving your data in multiple places using multiple methods--you're safe even if disaster strikes one location or collection of data.
Let's take a look at the ways you can expand your backup portfolio to protect against the inevitable data catastrophe. To ensure the safey of your important files, I recommend using at least a few of the following methods in unison.

Method 1: The Full-System Backup
With external 500GB hard drives readily available for as little as Rs 5K, there's no reason not to keep one plugged into your PC. Pair it with a drive-cloning utility like Macrium Reflect Free, which can perform scheduled, incremental backups with or without compression. A full-system backup to an attached drive is your best line of defense against data loss: In the event of total failure, it's a simple matter to restore every bit and byte to a replacement drive.

Method 2: The Remote, Data-Only Backup

 
While it's great to archive your entire hard drive, don't overlook the benefits of backing up just your critical data: documents, bookmarks, financial records, e-mail, address books, and so on. Why bother? Simple: Sometimes you just want to restore a handful of files or a select chunk of data. Plus, data-only backups take a lot less time than full system backups.
For this step, look to an online backup service like iDrive or MozyHome. Both offer 2GB of free storage and the option to upgrade to unlimited storage for a fee. Mozy relies on client software to help you select both common file types to back up and important user data files for programs like Outlook and Quicken, while iDrive uses an Explorer-style interface for selecting specific files and folders to preserve. The real advantage to both services is that they work automatically and in the background, uploading new and changed files while you work (or at scheduled times). That kind of set-it-and-forget-it backup is well worth a few bucks every month.
If you'd rather save your pennies and don't mind taking a more hands-on approach, loads of services let you park files online free of charge. ADrive, for one, offers 50GB of absolutely free storage. However, no synchronization is involved: It's up to you to pick and choose which files to upload, and when. Thus, use these services for files that don't change all that often, like MP3 and photo libraries.

Method 3: The Spare-PC Backup

 
These days it's not uncommon to own two or more PCs, and if you have family members under the same roof, they probably have their own machines as well. Why not create a "backup network" that leverages everyone's hard drives? All you need is SyncToy 2.0, one of Microsoft's free PowerToy utilities. With it, you can create "folder pairs" between PCs, copying files between them with a single click. This is a great way to sync, say, disparate photo libraries between your PC and your spouse's, and to create a backup of both in the process.
If your PCs aren't on the same network--one is at home and another is at work, for instance--try Microsoft's Windows Live FolderShare, which syncs files across the Internet (and does so automatically; SyncToy requires you to manually resync whenever you change or add files). FolderShare's advantage is that you can expand your backup network to include friends, syncing critical files to their machines and vice-versa. Like SyncToy, FolderShare costs nothing to use.

Method 4: The Document Backup
If you're a Google Docs user, you know that this Web-based office suite can import documents from Microsoft Word, Excel, and PowerPoint. But wouldn't it be great if you could actually synchronize those kinds of documents between your PC and the suite? You can with the free tool - OffiSync. It lives directly inside Office, as part of the same overall menu you use for opening files. A new entry, OffiSync, appears there. From here, you can save files to Google Docs, open files from Google Docs, add or remove collaborators to documents, and send a link to a Google Doc document via e-mail. It's exceptionally easy to use.

Method 5: The Bookmark Backup

 
If you're like most users, you've accumulated years' worth of bookmarks in your browser--a collection you definitely don't want to lose. Fortunately, it's a snap to copy those bookmarks to the Web for easy retrieval if the need ever arises. Firefox users should install the free Xmarks plug-in, while Internet Explorer users can accomplish the same thing with BookmarkSync. Incidentally, both tools can also keep your bookmarks in sync across multiple PCs, and both let you access them from any browser.

Method 6: The E-Mail Backup

 
Are you an e-mail packrat? If so, you'd probably be loathe to lose your archives. Start with one of two free backup utilities designed expressly for e-mail: Amic Email Backup, which copies everything--including your address book, account settings, and message rules--to a single compressed file; or Mailstore Home, which duplicates all your mail into a searchable archive and optionally backs it up to CDs or DVDs.
Amic supports nine e-mail clients, including Outlook, Outlook Express, and Eudora. Mailstore Home works with Windows Mail, Outlook, Outlook Express, Thunderbird, and Seamonkey.
Of course, unless you put those discs in a safe or upload the archive file to the Web, those kinds of backups are still vulnerable to fires and other local disasters. That's one reason to consider routing your e-mail through Gmail IMAP, which effectively creates a Web-based archive by syncing mail between Google's servers and your PC.
Start by signing up for a free Gmail account, then enabling IMAP and following the configuration instructions for your mail client. Then you can either configure your mail account to forward all messages to your Gmail account or set up Gmail's Mail Fetcher to retrieve messages from your ISP's POP3 server. From then on, all of your mail will go through Gmail, giving you more than 6GB of storage space for messages and attachments, and some excellent spam filtering in the bargain. Once you have everything set up, you'll forever have copies of your messages available in your Web-accessible Gmail account. That's not only an ideal e-mail backup, but just plain handy, too.

Method 7: The Already-In-Your-Pocket Backup

 
Finally, we come to the backups you already have--but don't know you do. For example, if you carry a smart phone that syncs with your PC, it's like having a mobile backup of your contacts, calendar, memos, and tasks. In the event of desktop data loss, just sync your device to restore everything to Outlook, or whatever contact manager you use. (Be sure to make a one-time adjustment to the sync settings so everything gets copied from the device to the PC, not the other way around.)
Likewise, if you own an iPod or other media player, you can use it to restore a lost or damaged music library. iPod users should check out iPod Folder, which copies music directly from the player to any folder on your Windows and Mac system. You can even store the program on your iPod so it's available on the spot. You can do the same thing with any MP3 player that your PC recognizes as a hard drive.

If you know the name of a process to kill, for example notepad.exe, use the following command from a command prompt to end it: taskkill /IM notepad.exe

This will cause the program to terminate but this will stop it permanently making you lose all unsaved data on that process. So rather suspend windows processes you need to than to kill them.

Tools to Suspend Windows Processes

# Free Windows Process Freezer

An easy to use free program for suspending (freezing) and resuming processes. It works similar to Windows Task Manager, but instead of terminating the process, the program allows you to suspend the problematic process and resume it later.

This program is very handy when a process is consuming lots of system resources, but you do not want to terminate it.
> Download Free Process Freezer : Link (400kb)
 In this case, use Free Process Freezer to suspend the process without losing any data, and resume it later whenever you wish.

# PsSuspend : Suspend Windows Processes CMD Tool

PsSuspend lets you suspend processes on the local or a remote system, which is desirable in cases where a process is consuming a resource (e.g. network, CPU or disk) that you want to allow different processes to use.
> Download PsSuspend : Link (1.3mb) | via microsoft
Rather than kill the process that’s consuming the resource, suspending permits you to let it continue operation at some later point in time.


Also : Best Command Prompt Tricks & Hacks for Windows

This is an excellent post which can really make your life easier in the *NIX world. But, for many, it is a Windows kind of life. So, for those of you out there, I have put together some Windows command line tricks that might make your life easier.

15 Popular Command Prompt Tricks & Hacks

Save A List of Files to a Text File by Extension

dir *.ext /s /b > files.txt

This command line will create a file called files.txt. When you open this file, there will be a complete list of all the files in that directory and all subdirectories with the .ext extension. You can then open up this text file in any text editor and work this the information.By changing the ext part, you can select different files. For example, if you wanted to list all of the PDF documents, you would type:

dir *.pdf /s /b > files.txt

Get Your IP Address Information

ipconfig /all

This will retrieve a pile of information about your network connection and IP information. From this command, you can get:
  • Host Name
  • Primary DNS Suffix
  • Node Type
  • IP Routing Enabled
  • WINS Proxy Enabled
  • DNS Suffix Search List
  • Connection-specific DNS Suffix
  • Network Adapter Description
  • Physical (MAC) Address
  • DHCP Enabled
  • IP Address
  • Subnet Mask
  • Default Gateway
  • DNS Servers

Get Installed Driver Information

driverquery

It can be very useful when troubleshooting to know what drivers are installed on a system. This command will give you a complete listing of the drivers and when they were installed.

Copy Files Via Infrared Port

irftp filename.ext

This will fire up the Wireless Link dialog so that you can copy the specified file via an infrared port.

Find Files Opened By Network Users

openfiles /query

If you are running a system and you want to know who has files open on your computer, this command will provide you a list of those users and the files that they have open.
Note: If you get an error saying The system global flag ‘maintain objects list’ needs to be enabled to see local opened files, you can fix this issue by typing openfiles /local on. You will have to reboot the system but it will resolve the issue.

Monitor Port Activity

netstat -a 30
This will show you all of the TCP/IP ports that are being used on your system and what they are connecting to (or being connected from). It will continue to monitor these ports and refresh theinformation every 30 seconds. You can change the refresh rate by changing the number at the end of the command.

Recover Information From A Corrupt File


recover filename.ext

If you have a disk with damaged sectors, you can attempt to recover as much information as possible from the damaged file. Data that is not damaged can be retrieved but data in damaged sectors will be lost.

Defragment Remote Computer

rexec remotePC defrag C: /F

This command used the rexec command to force a defragment of the C: drive on the computer named remotePC. You can use whatever you want to for the command (I just used defrag C: /F as an example). This is very useful for remote maintenance.

Retrieve Detailed System Information

systeminfo

With this command, you can retrieve the following information:
  • Host Name
  • OS Name
  • OS Version
  • OS Manufacturer
  • OS Configuration
  • OS Build Type
  • Registered Owner
  • Registered Organization
  • Product ID
  • Original Install Date
  • System Up Time
  • System Manufacturer
  • System Model
  • System type
  • Processor(s)
  • BIOS Version
  • Windows Directory
  • System Directory
  • Boot Device
  • System Locale
  • Input Locale
  • Time Zone
  • Total Physical Memory
  • Available Physical Memory
  • Virtual Memory Max Size
  • Virtual Memory Available
  • Virtual Memory In Use
  • Page File Location(s)
  • Domain
  • Logon Server
  • Hotfix(s)
  • NetWork Card(s)

Automatically Defragment C: Daily

schtasks /create /tn "Defrag C" /tr "defrag c: /f" /sc daily /st 23:00:00 /ru "System"

This will set your computer to automatically perform a complete defrag of the C: drive each day at 11:00:00 PM (23:00:00). It does this by creating a scheduled task called Defrag C. It will run this command under the computer’s system account.

Map A Drive Letter to a Folder

subst W: C:\windows

Sometimes, your directory structure can get pretty deep and complicated. You can simplify this a bit by mapping a drive letter to commonly used folders. In the example that I have given, this will create a drive letter W: and map it to the C:\windowsdirectory. Then, whenever you go into My Computer, you will see a W: drive and when you browse to it, it will automatically take you to the contents of the C:\windows folder.
You can do this with any unused drive letter and any folder that exists on your system.

List All Tasks Running On The Computer

tasklist 


It’s always good to know what is running on your system. This is the command line version of the processes tab in Taks Manager.

Kill A Program

taskkill /im programname.exe /f

If, when using the tasklist command, you discover that there is something running you just want killed. This is the way to do it! Just note the program name and use it in place of programname.exe.

Reboot a Remote Computer

shutdown -r -f -m \\remotePC -c "System will be rebooted in 20 seconds"

Sometimes, you just need to reboot a system. This will do it remotely and give the user a 20 second warning.
Tip : To open Command Prompt, click Start, click Run, type cmd, and then click OK.

Some More Command Prompt Tricks & Hacks – Video

How to Update Your BIOS

Posted by Narender Singh | 2:28 PM | | 0 comments »


BIOS Update Without a Hitch

Your computer's BIOS (Basic Input/Output System) is the first software your PC loads. It sets the stage for your operating system, so to speak, by finding all your PC's various hardware components and letting the operating system know it can use them.
As with any software, your computer or motherboard manufacturer periodically updates the BIOS to fix bugs, add compatibility with new devices, improve caching functions, and make several other hardware tweaks that can speed up your boot time and fix annoying issues. These updates are available at the manufacturer's site. But if you make a mistake in the update process, you risk rendering your PC unbootable. Here's how to make sure your BIOS update goes without a hitch.


 Step 1: Identify your current BIOS version.
The easiest way to find your BIOS version is to open up the System Information app in Windows--just type msinfo32 into the search bar (for Windows 7/Vista) or the Run box (XP), and click System Summary; your BIOS version should now show up on the right under your processor speed. Record your version number (and the date that appears afterwards, if applicable).


Step 2: Check your PC/motherboard manufacturer's Website for BIOS updates.
Most PC manufacturers handle BIOS updates based on your specific line and model, so head over to your manufacturer's support page and check its listings for your PC, because if you download and install a BIOS intended for a different model, your PC probably won't work (although most BIOS updaters are smart enough to notice if you try to install them on the wrong hardware). If there is a BIOS update file available, grab it--along with any documentation it comes with, because often warnings and specific instructions are contained in the Read Me docs.
Those of you who assembled your PC yourself will need to look for BIOS updates from your motherboard manufacturer's Website. If you don't remember your motherboard's model number, you can look it up without opening up the case by downloading and running CPU-Z and clicking on the Mainboard tab.


 Step 3: Read the included documentation.
The BIOS updater's Read Me file will most likely include a list of fixes and new functions, often to support new hardware. Updating the BIOS for my Lenovo Thinkpad T500, for example, added support for a new AC adapter and a 1600-by-900-pixel screen resolution on an external monitor; the update also fixed fan speed and Webcam issues that could not have been handled by updating Windows or my specific device driver software.

More important, however, were these notes in the Read Me file: If I was running Vista on my T500, I'd need to make sure that I had a certain patch installed; and if my T500 had a certain graphics card, I would need to update its drivers above a certain version before updating my BIOS. Read and reread your docs, or you might make your PC unable to boot without even knowing why.


Step 4: Update your BIOS.
Most newer PCs have a fairly easy BIOS update procedure: Just download the .exe file from your PC manufacturer's Website, quit all open programs, run the .exe, and let it handle the patch; then reboot. If your PC suddenly shuts down in the middle of the BIOS update, you won't be able to boot up, so make sure you're not running off a laptop battery. Ideally, you're plugged into an uninterruptible power supply (UPS), especially if you're in an area prone to blackouts.
Older PCs, however, might require you to set up your own bootable disk to update the BIOS yourself. You might still be able to download an app that configures a USB thumb drive, blank CD/DVD, or even a floppy disk so that you can boot off of it to update the BIOS, or an ISO image file that can be used in your disc-burning app of choice to create a BIOS update CD.
Other systems will have you copy a few files to your bootable disk, restart, and open up the BIOS during startup (typically by pressing a specified key for setup options), and change the boot order so your system looks for a bootable USB drive or CD before loading the OS from your hard drive.


Time Stopper is the software which can stop the time for try out version software. When you stop the time you can use your try-out versions forever. When you stop the time of a try-out version using this Time Stopper it works via this Time Stopper.


Hack Time Limit of Trial Softwares : Crack Trial Software


It allows you to lock the length of any shareware that are made at the beginning download, usually in the trial version and then are blocked and are made using only paying. With Time Stopper however, blocks the duration of a program and then make it usable indefinitely.


_


Download Time Stopper : Link
 
Real time and date run normally on your system. You can crack trial software and hack time limit of any number of try-out version software with this software.

Another Method : Backup the registry before installation of software, and restore the registry after trial period passed. You can also delete all registry keys manually to make it work.


One of the best ways to monitor cpu temperature is to install temperature reading software that might help you actually know if the problem is causing by overheating.


Find & Monitor CPU Temperature Inside Your Computer

It is a tiny but extremely powerful and accurate program which helps you monitor cpu temperature of each core simultaneously and can be easily installed on both Windows Vista and Windows XP.
Core Temp lets you monitor cpu temperature of Intel "Core Duo", "Core Solo" (Yonah), "Core 2 Duo", "Core 2 Extreme", "Core 2 Quad", " Pentium E2000" series, "Celeron 400\500" series (Allendale, Conroe, Merom, Kentsfield, Conroe-L respectively), "Xeon 3000/3200/5100/5300" series (Woodcrest, Clovertown respectively) and all AMD K8 (AMD64) and K10 (Phenom, Opteron) series die temperature.


The temperature readings are very accurate as the data is collected from a Digital Thermal Sensor (or DTS) which is located in each individual processing core, near the hottest part. This sensor is digital, which means it doesn’t rely on an external circuit located on the motherboard to report and monitor cpu temperature, its value is stored in a special register in the processor so any software can access and read it.
This eliminates any inaccuracy that can be caused by external motherboard circuits and sensors and then different types of programs trying to read those sensors while monitoring cpu temperature.


The best thing about this tool is that it displays the monitored cpu temperature of each core in the tray bar which doesn’t require you to click anywhere in the application itself to look at the current temperature.
> Monitor CPU Temperature with Core Temp – Download : 32 Bit | 64 Bit
You can find out more at AMD’s or Intel’s website about the optimal temperatures of the processors installed on your computer so that you can compare them with your own individual core temperatures easily and if you use over-clocked cpu then this utility should be a top priority!


One of the major drawbacks of Windows 7 (although it has so many new functionalities) is that we are not allowed to change the background Image that appears in the Login screen. By default, windows seven brings the blue background (the same screen image that comes by default in vista too).

But thanks to Thoosje Windows 7 Logon Editor, with a few clicks we can change windows seven’s logon screen.

Tip : What’s New in Windows 7 – 15 Latest Features you didn’t Know

Change Windows 7 Login Screen Background

You can change your Windows 7 Login screen in seconds and reverse settings it back to the previous and original logon screen anytime. It’s also comes with a browsing function to select your own images and has a build in control the image doesn’t exceed theWindows 7 limit of 246KB for the maximum size of the Login screen image size.


Of course it has a preview option so you can see the effect of the changes before committing to them. 

> Download Thoosje Windows 7 Logon Editor : Link
It also comes with a library of free login screen backgrounds, Like great windows 3D logo’s and various other Themes like Movie, Cars and many more.

Similar Tool for Changing Logon Screen


Check out Logon Changer [Link], that lets you choose a image file to use as your logon background. That all what you do, just choose an image and Logon Changer will take care of everything else including the file size limit. It also makes it super easy to revert back to the default Logon Screen.

Related Post: Change windows 7 logon screen background manually

Recover Files From Recycle bin

Posted by Narender Singh | 6:24 PM | , | 0 comments »


Free Data Recovery Softwares - Get Back Deleted Files Generally whatever we delete ends up in the recycle bin. But many times we Shift+Delete or delete from the recycle bin itself only to realize how important that file was.
This is when data recovery softwares are needed. But most are costly, so here are some of the best free softwares to recover deleted files.

Free Data Recovery Softwares – Get Back Deleted Files

#1- Recuva (link)

Accidentally deleted an important file? Lost something important when your computer crashed? No problem! Recuva recovers files deleted from your Windows computer,Recycle Bin, digital camera card, or MP3 player.
Recuva Free Softwares to Recover Deleted Files


Even if you’ve formatted a drive so that it looks blank, Recuva can still find your files on it, means you can also get back deleted music from your iPod or MP3 player.

#2- Restoration (link) - Free File Recovery Software

Restoration is a freeware program by Brian Kato that restores deleted files no longer in the Recycle Bin. The good news is that it works not only on Windows 9x versions, but also on Windows NT, 2000, and XP — even in NTFS!
Restoration  Free File Recovery Software
It will fit neatly on a floppy, since it is only 406 KB in size and you can also run it from your hard drive. You can read more about Restoration here.

#3- EASEUS Deleted File Recovery (link)

EASEUS Deleted File Recovery is an easy-to-use program with a Graphical User Interface without technical skill requirement through the whole recovery process. Simply launch the software, specify the disk where lost data located, click "Next" button, all the deleted files will be listed. The found files can be previewed before you recover it.
EASE US Deleted File Recovery
Devices supported: Hard Disk Drive, Compact Flash, Memory Stick Duo, Memory Stick Pro, Memory Stick Pro Duo, miniSD, MultiMediaCard (MMC), SD Card, SmartMedia, xD Picture Card, Digital Cell Phones, PDA, Zip Disk, PCMCIA PC, Floppy Disk, Micro Drive, any compact flash, and any memory stick.


The Greatest Windows Tips of All Time

Posted by Narender Singh | 2:30 PM | , | 0 comments »


If you don't know every one of these 26 classic tricks, utilities, and shortcuts for XP, Vista, or Windows 7, you're not getting your money's worth out of Windows.


Whether you're a grizzled Windows vet or a relative newcomer, you can always use a trick or two for making things go faster. We've compiled our 26 favorite time-saving tips for Windows XP, Vista, and 7. Print out this story and keep it on your desk, under your pillow, or anywhere else.

Classic Windows Tips

Toggle between apps: Use Alt-Tab to switch open programs without touching your mouse. The oldest--and still the best--Windows timesaver.
Navigate app windows: Press Ctrl-Tab to cycle through an application's windows (or through a Web browser's tabs). First cousin of the tip above, and probably the most underrated tip ever.
When in doubt, type it out: If you don't want to hunt through nested menus and the like, you can access most functions, applets, or files the old-fashioned way--by entering them into the Search box. Type Calculator, Control Panel, or even the name of a piece of music on your hard drive, and press Enter.


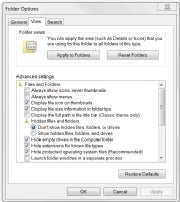
Folder OptionsFull-frontal folders: In Windows Explorer, click Folder Options (located under the Organize menu) to reveal hidden files, show the full path in the title bar, display file extensions, and more.
Unobtrusive updates: Keep your OS current by opening Windows Update (Automatic Update in XP) and setting it to Download updates but let me choose whether to install them. (To get there, press the Windows key and type Windows Update.) That way, you won't have Windows urging you to restart when you don't want to (or worse, triggering a restart when you're away from the PC with an unsaved document open).


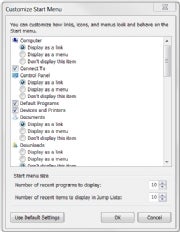
Customize Start MenuTweak your taskbar: Right-click the Taskbar and choose Properties to find options for switching to the old Start menu, choosing which icons show in the notification area, setting default programs to appear in the Start bar menu, and more.
Partition, partition, partition: Make backups and restores easier by partitioning your hard drive and keeping one partition for the OS and the other for your documents and data.


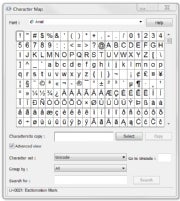
Character MapMake your text special: Need a special character such as © or á? Press the Windows key and type character map in the field to bring up an app that will let you copy and paste the characters you need.

Simple screen capture: Take a screenshot by pressing Print Screen, which copies an image of your full screen to your clipboard so that you can paste it into Paint or your preferred image editor. To capture just the active window, use Ctrl-Alt-Print Screen. For more fine-tuned controls, try Screenshot Captor.


Take a shortcut: Right-click on any application icon, bring up the Properties menu, and click the Shortcuts tab. You can specify a keystroke combination to start your application here. Our personal favorite: Making a shortcut for Windows 7's Snipping Tool makes screenshots much easier. (Windows 7 only)


Sticky KeysSticky keys (the good kind): Holding down two keys at once--such as Ctrl-C to copy--is a royal pain. Press the Shift key five times to start Sticky Keys, a feature that allows you to initiate a keyboard shortcut by merely pressing Shift, Ctrl, Alt, or Windows instead of holding that particular key down. Press Shift five more times to toggle Sticky Keys off.

Line 'em up: Want to arrange two (or more) windows side by side in Windows XP or Vista? Hold down Ctrl and click on the desired windows in the taskbar; then right-click the taskbar and select Tile Vertically. In Windows 7, you can simply drag any open window to the right or left edge of your screen and then let go.
Instant classic (control panels): Miss Windows' old Control Panel, which conveniently displayed all of its items at once? In Windows XP and Vista, just open the Control Panel and select Switch to Classic View. In Windows 7, click the View by drop-down menu in the upper-right corner and select your preference.


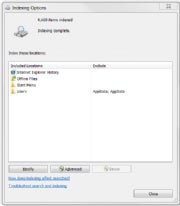
Indexing OptionsIndex this, not that: The Windows Search indexer speeds up built-in search functions, but the indexing process itself can consume system resources at inconvenient times. Open Indexing Options in Control Panel (or press the Windows key and type Indexing Options). The resulting dialog box will let you specify which folders or types of data are indexed to avoid bogging down your PC needlessly.

Speed Up Your Services

Manage the Task Manager: Windows' built-in Task Manager (press Ctrl-Alt-Del and click Task Manager) is great for seeing what your system is up to, but power users will prefer Process Explorer, which shows more details that can help you find a memory leak or troubleshoot a pesky DLL problem.
Nudge your network: If you have network problems, try opening the command prompt (enter cmd in the Start menu's search box) and typing ipconfig /renew to reset your network connection.

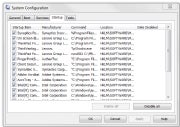
System ConfigurationClean up your startup: If your PC drags its feet during the startup process, press the Windows key and type msconfig to open the System Configuration utility. Check in the Startup tab to see what your machine is loading. Your computer might be loading services or apps that you don't need or want to use on startup.


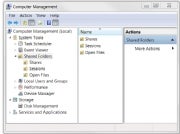
Shared FoldersSharing is caring: For a little assistance in tracking your shared folders, right-click My Computer (or Computer in Windows 7) and click Manage to bring up the Computer Management tool. Then click Shared Folders to see a list of all of your machine's shared folders, file-sharing sessions, and open files.


Essential Add-Ons

Look, Ma, no mouse: XP users should grab Launchy, a free keyboard-driven launcher application that allows you to access programs, files, and even Websites with just a few keystrokes. (Vista and Windows 7 users get the same functionality from the Start menu's search tool.)

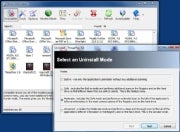
Revo UninstallerCleaner than you found it: To make sure that your programs uninstall completely, use Revo Uninstaller--it's often more thorough than the programs' own supplied uninstaller routines.

Annoyance buster: If you're tired of User Account Control dialog boxes popping up all the time in Windows Vista, but you don't want to disable the security feature completely, grab TweakUAC to set it to Quiet Mode. Windows 7 has its own UAC controls, but can still benefit from TweakUAC.

Get your hands dirty with Greasemonkey: Optimize your Web browsing with Greasemonkey for Firefox, an add-on that lets you choose among thousands of user-designed scripts for blocking ads, changing the layouts of popular sites, and more. (Variants also exist for Internet Explorer, Chrome, and Safari.)

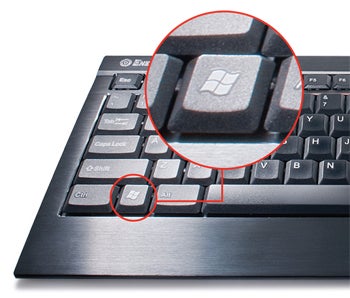
Work Your Windows Key


Windows key

Lock your doors (and Windows): Stepping out for a minute? Remember to press Windows-L to lock your computer's screen so that no one can nose around without entering your account password.

Run, Windows, run: To access the Run command easily, press Windows-R.

Keyboard explorer: Want to open a new Windows Explorer window without leaving the keyboard? Press Windows-E.

Declutter your desktop: Access your desktop instantly by pressing Windows-D to hide all open windows. Press Windows-D again to return to where you were.