
Showing posts with label Windows. Show all posts
Showing posts with label Windows. Show all posts

After a lot of time on the internet i've found a very good software to do all the task for you, in just a minute and all for free.
It removes all sort of pop-ups you get - Before the welcome screen, After connecting to the internet, and after 5-10 minutes constantly after that.
You'll also get rid of that dark desktop, and you'll be able to use any of your walpaper, or one from the themes afet that. It'll remove everything related to windows activation.

Top 10 sites to test your broadband connection speed
Are you getting the optimal bandwidth that you paid for? Test your internet connection for speed, latency and packet loss with 10 free online tools.Follow these five steps first to get accurate broadband speed test results before you start testing:
- Why do you need ten different options to test your broadband connection? Well, we’d suggest you try all ten to get and average out the results. You can then more or less confirm the kind of bandwidth that your service provider is piping to you. If you have the patience, it is suggested that you try each tests at least twice to ensure that the occasional drop in bandwidth or any communication by the background apps don’t end up giving you the wrong picture.

Obviously you can open up Windows Explorer, find your file, and rename it the old-fashioned way. But there are two quicker, easier options, both of which let you stay inside the program you're already using....

With dozens of Windows PCs available at retail, each preloaded with one of several versions of Microsoft's Windows 7 operating system, it's far too easy to buy a version of the OS that doesn't meet your needs. Maybe that bargain Acer Aspire One netbook you're eying runs Windows 7 Starter, but you'd prefer Windows 7 Home Premium, which adds the slick Aero interface, better media tools, and the ability to run more than three apps at once.
Or perhaps you're ready to buy a full-size HP laptop with Win 7 Home Premium, but you really need the enhanced networking and backup tools of Win 7 Professional. (In all, there are six versions of Windows 7.)
Well, Microsoft has a new promotion designed to tickle your upgrade bone at point of sale. Starting April 4, PC buyers will be able to upgrade to fancier version of Windows at a reduced price. Here's the U.S. price breakdown from the company's Windows Blog:
- Windows 7 Starter to Windows 7 Home Premium: $49.99 (regular price is $79.99)
- Windows 7 Home Premium to Windows 7 Professional: $79.99 (regular price is $89.99)
 Since every copy of Windows 7 is really the Ultimate version (with all the bells and whistles) in disguise, the upgrade should be relatively quick and painless, Redmond says. Win 7 has a tool, Windows Anytime Upgrade, for just this purpose.
These deals are better than nothing, I suppose, but they're hardly barnburners. After all, a $10 savings isn't much of an incentive to upgrade to Win 7 Professional. And will customers who pay $250 for a cheap netbook want to shell out another $50 for Win 7 Home.
Microsoft's OS-upgrade deals are available at participating retailers for a limited time. In the U.S., the offer ends July 3.

If you remove an installed program and its files by deleting the files, it may still show up in the Add/Remove programs list through the control panel. In order to remove it from the list (so you don ’t need to re-install in order to just
remove it again).
1. Start the Registry Editor by clicking RUN from start menu and entering ‘regedit’ without quotes.
2. Open HKEY_LOCAL_MACHINE / SOFTWARE / Microsoft / Windows / CurrentVersion / Uninstall
3. Delete any programs from the list.
This will only delete them from the list, not delete the actual programs. Only programs designed for Windows95 will show up here in the first place.
Are you shocked seeing this error message?

Rescuing Steps:
step1: Goto Start-> Run -> type "gpedit.msc" and click OK
Step2: Navigate to User Configuration -> Administrative Templates -> System -> Ctrl+Alt+Delete Options
Step3: Double click it on Remove Task Manager in the right-hand pane
Step4: Choose the option "Not Configured" and click Ok
Step5: Close the Group Policy Window
Result: Task manager is enabled...

Find Windows XP CD key inside your Windows XP CD
To get the Windows XP CD key, you have to do the following steps. Just follow the following steps and find Windows XP cd key into your windows XP CD.
Steps to follow to find Windows XP CD key:
- Bring your Windows XP CD and insert it into your computer’s CD/DVD ROM/ RAM.
- Now, browse your Windows XP CD and find the folder I386.
- Inside I386 folder, find the file named as unattended.txt.
- Open unattended.txt by using notepad.
- At last, keep scrolling of the opened file and you will get Windows XP CD key. (See Pic Below)
Windows XP CD Key inside CD
To me, it’s the most amazing thing of Windows XP CD. In this way, you can get the Windows XP CD key into your Windows XP CD. The people who are not wish to buy XP or the people who lost the serial key of Windows XP CD, can find the Windows XP CD key in this way.
This will cause the program to terminate but this will stop it permanently making you lose all unsaved data on that process. So rather suspend windows processes you need to than to kill them.
Tools to Suspend Windows Processes
# Free Windows Process Freezer
An easy to use free program for suspending (freezing) and resuming processes. It works similar to Windows Task Manager, but instead of terminating the process, the program allows you to suspend the problematic process and resume it later.
This program is very handy when a process is consuming lots of system resources, but you do not want to terminate it.
> Download Free Process Freezer : Link (400kb)
In this case, use Free Process Freezer to suspend the process without losing any data, and resume it later whenever you wish.
# PsSuspend : Suspend Windows Processes CMD Tool

> Download PsSuspend : Link (1.3mb) | via microsoft
Rather than kill the process that’s consuming the resource, suspending permits you to let it continue operation at some later point in time.
Also : Best Command Prompt Tricks & Hacks for Windows

But thanks to Thoosje Windows 7 Logon Editor, with a few clicks we can change windows seven’s logon screen.
Tip : What’s New in Windows 7 – 15 Latest Features you didn’t Know
Change Windows 7 Login Screen Background
You can change your Windows 7 Login screen in seconds and reverse settings it back to the previous and original logon screen anytime. It’s also comes with a browsing function to select your own images and has a build in control the image doesn’t exceed theWindows 7 limit of 246KB for the maximum size of the Login screen image size.
Of course it has a preview option so you can see the effect of the changes before committing to them.
It also comes with a library of free login screen backgrounds, Like great windows 3D logo’s and various other Themes like Movie, Cars and many more.
Similar Tool for Changing Logon Screen

Check out Logon Changer [Link], that lets you choose a image file to use as your logon background. That all what you do, just choose an image and Logon Changer will take care of everything else including the file size limit. It also makes it super easy to revert back to the default Logon Screen.
Related Post: Change windows 7 logon screen background manually

If you don't know every one of these 26 classic tricks, utilities, and shortcuts for XP, Vista, or Windows 7, you're not getting your money's worth out of Windows.
Whether you're a grizzled Windows vet or a relative newcomer, you can always use a trick or two for making things go faster. We've compiled our 26 favorite time-saving tips for Windows XP, Vista, and 7. Print out this story and keep it on your desk, under your pillow, or anywhere else.
Classic Windows Tips
Toggle between apps: Use Alt-Tab to switch open programs without touching your mouse. The oldest--and still the best--Windows timesaver.Navigate app windows: Press Ctrl-Tab to cycle through an application's windows (or through a Web browser's tabs). First cousin of the tip above, and probably the most underrated tip ever.
When in doubt, type it out: If you don't want to hunt through nested menus and the like, you can access most functions, applets, or files the old-fashioned way--by entering them into the Search box. Type Calculator, Control Panel, or even the name of a piece of music on your hard drive, and press Enter.
 Full-frontal folders: In Windows Explorer, click Folder Options (located under the Organize menu) to reveal hidden files, show the full path in the title bar, display file extensions, and more.
Unobtrusive updates: Keep your OS current by opening Windows Update (Automatic Update in XP) and setting it to Download updates but let me choose whether to install them. (To get there, press the Windows key and type Windows Update.) That way, you won't have Windows urging you to restart when you don't want to (or worse, triggering a restart when you're away from the PC with an unsaved document open).
 Tweak your taskbar: Right-click the Taskbar and choose Properties to find options for switching to the old Start menu, choosing which icons show in the notification area, setting default programs to appear in the Start bar menu, and more.
Partition, partition, partition: Make backups and restores easier by partitioning your hard drive and keeping one partition for the OS and the other for your documents and data.
 Make your text special: Need a special character such as © or á? Press the Windows key and type character map in the field to bring up an app that will let you copy and paste the characters you need.
Simple screen capture: Take a screenshot by pressing Print Screen, which copies an image of your full screen to your clipboard so that you can paste it into Paint or your preferred image editor. To capture just the active window, use Ctrl-Alt-Print Screen. For more fine-tuned controls, try Screenshot Captor.
Take a shortcut: Right-click on any application icon, bring up the Properties menu, and click the Shortcuts tab. You can specify a keystroke combination to start your application here. Our personal favorite: Making a shortcut for Windows 7's Snipping Tool makes screenshots much easier. (Windows 7 only)
 Sticky keys (the good kind): Holding down two keys at once--such as Ctrl-C to copy--is a royal pain. Press the Shift key five times to start Sticky Keys, a feature that allows you to initiate a keyboard shortcut by merely pressing Shift, Ctrl, Alt, or Windows instead of holding that particular key down. Press Shift five more times to toggle Sticky Keys off.
Line 'em up: Want to arrange two (or more) windows side by side in Windows XP or Vista? Hold down Ctrl and click on the desired windows in the taskbar; then right-click the taskbar and select Tile Vertically. In Windows 7, you can simply drag any open window to the right or left edge of your screen and then let go.
Instant classic (control panels): Miss Windows' old Control Panel, which conveniently displayed all of its items at once? In Windows XP and Vista, just open the Control Panel and select Switch to Classic View. In Windows 7, click the View by drop-down menu in the upper-right corner and select your preference.
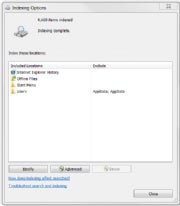 Index this, not that: The Windows Search indexer speeds up built-in search functions, but the indexing process itself can consume system resources at inconvenient times. Open Indexing Options in Control Panel (or press the Windows key and type Indexing Options). The resulting dialog box will let you specify which folders or types of data are indexed to avoid bogging down your PC needlessly.
Speed Up Your Services
Manage the Task Manager: Windows' built-in Task Manager (press Ctrl-Alt-Del and click Task Manager) is great for seeing what your system is up to, but power users will prefer Process Explorer, which shows more details that can help you find a memory leak or troubleshoot a pesky DLL problem.Nudge your network: If you have network problems, try opening the command prompt (enter cmd in the Start menu's search box) and typing ipconfig /renew to reset your network connection.
 Clean up your startup: If your PC drags its feet during the startup process, press the Windows key and type msconfig to open the System Configuration utility. Check in the Startup tab to see what your machine is loading. Your computer might be loading services or apps that you don't need or want to use on startup.
 Sharing is caring: For a little assistance in tracking your shared folders, right-click My Computer (or Computer in Windows 7) and click Manage to bring up the Computer Management tool. Then click Shared Folders to see a list of all of your machine's shared folders, file-sharing sessions, and open files.
Essential Add-Ons
Look, Ma, no mouse: XP users should grab Launchy, a free keyboard-driven launcher application that allows you to access programs, files, and even Websites with just a few keystrokes. (Vista and Windows 7 users get the same functionality from the Start menu's search tool.) Cleaner than you found it: To make sure that your programs uninstall completely, use Revo Uninstaller--it's often more thorough than the programs' own supplied uninstaller routines.
Annoyance buster: If you're tired of User Account Control dialog boxes popping up all the time in Windows Vista, but you don't want to disable the security feature completely, grab TweakUAC to set it to Quiet Mode. Windows 7 has its own UAC controls, but can still benefit from TweakUAC.
Get your hands dirty with Greasemonkey: Optimize your Web browsing with Greasemonkey for Firefox, an add-on that lets you choose among thousands of user-designed scripts for blocking ads, changing the layouts of popular sites, and more. (Variants also exist for Internet Explorer, Chrome, and Safari.)
Work Your Windows Key

Run, Windows, run: To access the Run command easily, press Windows-R.
Keyboard explorer: Want to open a new Windows Explorer window without leaving the keyboard? Press Windows-E.
Declutter your desktop: Access your desktop instantly by pressing Windows-D to hide all open windows. Press Windows-D again to return to where you were.

If your system is slow and you don’t have the cash to spend on upgrades, we’ve got the answer: tweak it until it flies!
The road to a faster PC starts by properly optimising your hardware. While some of these procedures can be risky, they can also prove very effective, often delivering direct and noticeable performance gains in every area of your system.Update the BIOS
Upgrading your PC’s BIOS, or firmware in other devices like the router, could be a quick way to improve performance, fix bugs and even add new features. Look for the current BIOS version number on your boot screen or in the BIOS set-up program and then visit the manufacturer’s site to check for recent upgrades.Disable unwanted devices
Speed up the boot process by turning off motherboard devices that you’re not using, such as integrated sound, graphics, extra network ports and so on. Look for a BIOS set-up menu called something like Integrated Peripherals to find the options that you need. Once Windows starts, launch Device Manager (‘devmgmt.msc’), locate any remaining unwanted devices, right-click them and select ‘Disable’ to save more resources. Be careful, though – disable the wrong device and you’re likely to find that your PC won’t be able to reboot. If you’re in any doubt about what a service does, look it up on the internet or leave it well alone.Kick-start your PC
Optimising your BIOS settings will make for a quicker boot. Turn off the extended memory test, since it’s useless, then turn on a QuickBoot or FastBoot mode (the names may vary) for a little extra speed. Next, browse your BIOS set-up program looking for the boot order settings (often found under a Boot or ‘Startup | Boot’ menu), which is a list that determines where your system looks for bootable devices. Make sure that your hard drive comes right at the top of the list to avoid your system wasting time checking other devices. If you need to boot from CD later on (typically to install a new operating system or run a Live CD), you can temporarily change it back.Get rid of USB checks
If you leave a USB drive connected to your PC and it appears in the boot order before your hard drive, then your PC will give the drive some time to initialise before checking whether it’s bootable. In some BIOSes this time is called the USB Mass Storage Delay, and it can be determined by you. If you never boot from a USB drive then set this to the lowest available figure to minimise any delay. If you find that you need to boot from a USB device in the future, simply increase the figure again.Overclock the CPU

You’ll use more power, and components will have a greater chance of failing – so don’t try this unless you’re willing to accept the risks of doing so. Assuming you are, launch your BIOS set-up program and look for the overclocking settings (try the Advanced menu). Exactly what’s available depends on your hardware, but in principle increase your CPU and memory frequencies just a little. Boot your system and stress-test it with tools such as memtest86+ and OCCT to confirm that all is well. If it is, increase the frequencies a little more, and see what happens; if not, reduce the frequencies or increase the voltages (VCore, memory voltage), which should allow you to run a little faster (although doing this also risks burning out your components). Don’t do anything until you know what’s appropriate for your hardware, though. The Extreme Overclocking forum is a great place to find out more.
Safely overclock the CPU
If you’ve got an Intel Core 2 Duo or Core i7 CPU, check your BIOS for a setting like ‘Intel Dynamic Acceleration’ or ‘Turbo Mode’, and ensure it’s turned on. This handy setting will automatically overclock one core while shutting off the others, improving single-threaded performance. If you’re already overclocking, though, this setting stands a good chance of locking up your PC. Disable it and you may be able to push things just a little bit further.Clean your laptop fan
Over time, the fans and vents on a laptop will become covered with dust, hairs and assorted gunk. The system then runs hotter, so your fan is on for longer and battery life falls. Worse still, your CPU speeds may be throttled to try and reduce the temperature. It’s a very good idea to open the case and carefully clean away any dust to make sure that the airflow is unobstructed.Speed up graphics
Overclocking your graphics card can give games a little extra zip. How you get to the right settings will vary, but on our test PC, you right-click the desktop, select ‘Nvidia Control Panel | Adjust GPU settings’ and choose ‘Custom clock frequencies’ to find the ‘Core bus and memory bus’ figures. Increase them just a little to give more speed. After that, it’s much like overclocking your CPU: test that everything is OK, increase the clock rate again if it is, wind the settings back a little if your PC crashes and repeat until your system is stable. You can read more on ATI and Nvidia tweaks at TweakGuides.Safely speed up graphics
Some BIOSes offer very basic PCI Express graphics card overclocking with a setting called ‘PEG link mode’. If you don’t intend to try more intensive overclocking, set this to its highest setting (usually ‘Faster’) and you should see a little extra speed.
Optimise the RAM
It takes time to access your RAM, but you can minimise this delay by playing around with the BIOS memory timings. There’s normally a timing entry set to ‘By SPD’, which means that your system uses the default timing values set by your RAM. Set this to ‘Disabled’ or ‘User defined’ and you can choose your own timings. Look for ‘CAS Latency’, say, reduce it by one setting, reboot and test that your system is working correctly. Repeat until your PC becomes unstable, then increase the value by one and move on to something else (check your BIOS documentation for more). Crashes here could stop your PC booting at all, even into the BIOS, so make sure that you know how to reset your BIOS to its default settings before you start messing around with any values.Edit the BIOS
If your Nvidia drivers are proving unhelpful, then there is another way to ramp up your graphics performance – edit the BIOS directly. Of course, this is also the quickest way to trash your card altogether. Don’t try this unless you’re willing to take the risk. To do it, download a copy of Nibitor and then run it. Click ‘Tools | Read BIOS | Select device’, choose your graphics card and click ‘OK’, then click ‘Tools | Read BIOS | Read into Nibitor’ to start experimenting. Annoyed that you can’t change the shader clock in the driver? Just click the Clockrates tab and change it to whatever you like. Tweak the other settings, click ‘File | Save’ and then use a tool like NVFlash to update your card. See www.mvktech.net for more detailed instructions.Stop network throttling
Windows Vista limits network transfers when you’re playing multimedia files to stop your music or video skipping. Great idea, but it can reduce performance on some high-speed network connections. To fix this, go to ‘HKEY_LOCAL_MACHINE\SOFTWARE\Microsoft\Windows NT\CurrentVersion\Multimedia\SystemProfile’ and create a new DWORD value called ‘NetworkThrottlingIndexValue’. Set this to values between one and 70 (10 is the default, higher values mean less throttling) or ‘FFFFFFFF’ to disable throttling completely.
Turbocharge GMA
Many laptops use Intel’s Graphics Media Accelerator (GMA) video chipset, which is too slow for most games or other graphics-intensive packages. Some low-voltage GMA chipsets are drastically underclocked, though, and are able to perform far better than the default settings suggest. GMABooster (www.gmabooster.com) takes advantage of this to increase your GMA clock rate by x2.4, without voltage changes or affecting system stability.Disable Acoustic mode
Some BIOSes contain a setting that makes your hard drive run more quietly. This sounds great, but unfortunately it negatively affects performance. If you’re more concerned with increasing your system’s speed than reducing the amount of noise it makes, check your BIOS program for a setting like ‘HDD Acoustic mode’ (it’s in the Performance section on Dell desktops, for example) and make sure that it’s set to ‘Performance’ rather than ‘Quiet’.Enlarge the cache
Windows Vista stores your hard drive writes in a cache. This helps it to write data more efficiently and improves performance. To run faster still, launch ‘devmgmt.msc’, expand the Disk Drives section, right-click your drive, select ‘Properties | Policies’ and check ‘Enable advanced performance’. Windows now uses a larger cache and writes from it less often, improving performance but also increasing the risk of data loss if the drive loses power.Use ReadyBoost (or not)
Windows Vista can use high-speed USB flash drives to cache data and hopefully improve performance. To try it out, plug in a USB device and then confirm that you’d like to use it with ReadyBoost if you’re asked. If you’re not, go to Computer, right-click the device and select ‘Properties’. If the feature can be used, there will be a ReadyBoost tab; click this, select ‘Use this device’, choose the space that you’d like to give to Windows and click ‘OK’. Alternatively, if you have no interest in using ReadyBoost, turn it off to save a few system resources. To do this, launch ‘services.msc’, double-click ReadyBoost, click ‘Stop’ and set ‘Startup type’ to ‘Disabled’.Avoid Wi-Fi interference
Poor wireless network performance is sometimes down to interference, perhaps because your neighbours are also running a Wi-Fi network on the same channel. To find out if this is happening, run a network detector like Inssider or Vistumbler to see what’s going on. If you find that your neighbours already have wireless kit working on channel 11 (a common default) then switch your kit to channel six, say, to see a real performance boost.Try CompactFlash cards
They’re more expensive and less portable than USB flash drives, but CompactFlash cards can be much faster to use. If your system has an internal reader (so not one connected via USB) then give one a go; we tested the SanDisk Extreme IV CompactFlash card and found that it delivered speeds of over 40MB/s, more than twice what you’ll see with many USB drives. It also worked with ReadyBoost on our PC and delivered a noticeable improvement in performance.Reformat your USB drive
If you must stick with USB drives instead of switching to CompactFlash cards, make sure that they’re formatted using the best filesystem. NTFS delivers the worst performance, so avoid it like the plague. FAT32 is better, but if you only need to use the drive on Vista systems then use exFAT for the best speeds. To reformat your USB drive, right-click on it, select ‘Format’ and then choose either ‘FAT32’ or ‘exFAT’ in the File System list. See TestFreaks for some benchmark figures.Up the DRDY timing
The BIOS DRDY (Device Ready) timing setting configures how quickly IDE or SATA devices will become available after they’ve completed their existing commands. Changing this setting to its highest possible option (which is usually ‘Optimise’) will improve system performance a little, but it could also result in a crash or even data loss. As always with potentially dangerous tweaks, experiment with it at your own risk.
Streamline PC startup
Your PC will boot more quickly if you give it less work to do during the start-up process. Remove discs from your DVD drives and Windows won’t wait while they spin up. Unplug USB devices that you won’t be using for a while, and your system won’t load drivers unnecessarily. Finally, use Autoruns to display and strictly limit the number of programs that launch when Windows starts, and Startup Delayer to postpone the launch of non-critical start-up programs for a minute or two, letting your PC focus on booting up instead of running apps.Disable services
Save your system resources by disabling unnecessary services. If you have Windows Vista and don’t use Media Center, for instance, then launch ‘services.msc,’ double-click the Windows Media Center Extender, Receiver and Scheduler services and set their Startup Type to ‘Disabled’. Black Viper’s website has more. Vista users can also delay the launch of non-critical services, which can help your PC to start a little faster. To try this out, launch services.msc, double-click something you won’t need immediately and set its Startup Type to ‘Automatic (delayed start)’. Now reboot to see if it makes a noticeable change.Decrease waiting time
If your PC has two or more operating systems then you’ll see a boot menu when it starts. To decrease the amount of time it waits before choosing the default setting, right-click Computer, select ‘Properties | Advanced system settings | Startup and recovery settings’, choose your default OS and set the ‘Time to display list of operating systems’ to something like 10 seconds.
Log in automatically
If you’re the only person who uses your PC, you can save time by logging in automatically. Be aware that this does introduce a security risk, however, as anyone with access to your system can do the same thing. Launch the command ‘control userpasswords2’, uncheck ‘Users must enter a user name and password’, click ‘OK’, enter the log-on user name and password if you’re prompted and click ‘OK’ again to enable automatic login.Browse the Event Viewer
Windows Vista analyses every boot and shutdown, then records any programs that are slowing you down. To have a look for yourself, launch ‘eventvwr.msc’, expand ‘Applications and services logs | Microsoft | Windows | Diagnostics – performance | Operational’, and click on the ‘Warning’, ‘Error’ and ‘Critical’ events. Sometimes Vista gets this wrong, but if the same name keeps coming up then remove, update or reinstall the app to speed up your PC.Prioritise programs
If you’re running lots of programs simultaneously but one is particularly important, you can make the CPU give it a high priority. To do so, press [CTRL]+[Shift]+[Esc] to launch Task Manager, right-click the app and select ‘Go to process’. Then right-click the process, select ‘Set priority | Above normal’, and it may now get more CPU time. Alternatively, set a resource-hogging app to ‘Below normal’ priority and other programs should become faster. Don’t tweak critical or system processes, though, or your PC may crash.Recover Vista resources
If you don’t use the sidebar then right-click it, select ‘Properties’ and clear ‘Start Sidebar’ to prevent it loading in future. If you’ve installed your own antivirus software then you don’t need Windows Defender. Launch Defender; click ‘Tools | Options’, scroll down to ‘Administrator options’ and deselect the ‘Use Windows Defender’ box. You can also either turn off Aero to save a big chunk of RAM, or optimise it by right-clicking Computer, selecting ‘Properties | Advanced | Performance settings’ and choosing ‘Adjust for best performance’. The indexing service is useful, helping you find files and folders at speed, and it only runs when your PC is idle. Still, some say turning it off makes a real performance difference. If you rarely use the search function then launch ‘services.msc’, double-click Windows Search, click ‘Stop’ and set Startup Type to ‘Disabled’ to turn it off.Replace Windows search
If you have turned Windows searching off, replace it with the utility Everything. This runs far more quickly, and it builds its database from the NTFS Master File Table, so no disk crawling is required. It only works with NTFS though, and can’t search the contents of files. If your search problems are with Outlook, take a look at Xobni, which the authors say is up to 50 times faster than the default Windows keyword search.Copy more quickly
If Windows takes forever to copy files, use TeraCopy or FastCopy instead. These apps deliver better performance and handy extras like the ability to pause the copy process. Use Fling to schedule network or FTP transfers to take place when you’re not around.Use speedy DNS servers
When you enter a domain name into your browser, is has to be resolved into an IP address by your ISP’s DNS server. If this is overloaded then there will always be a browsing delay. Fortunately, OpenDNS has fast alternative DNS servers that you can use for free. To try OpenDNS, launch ‘NCPA.CPL’, right-click your internet connection and select ‘Properties’. Click ‘Internet Protocol (TCP/IP)’ and hit ‘Properties’ (use ‘v4’ on Vista), then choose ‘Use the following DNS server addresses’ and enter ‘208.67.222.222’ in the ‘Preferred’ and ‘208.67.220.220’ in the ‘Alternate’ boxes.Put your PC to sleep
If you have Vista, choose ‘Sleep’ rather than ‘Shutdown’ to save some time the next time you want to use your machine. Windows saves the state of your PC rather than closing it, which means it turns off (and reboots later) far more quickly. Or at least that’s the plan. If Sleep won’t work for you then it’s probably a driver problem. Check the Event Log to see what’s going wrong.Reduce task switching
Regular editions of Windows switch rapidly from one program to another, ensuring a responsive user interface. But each task switch is an overhead, wasting CPU time. If you don’t need a highly responsive interface – you’re using Microsoft Office rather than playing 3D games, say – then giving each app more CPU time before moving to the next will cut task switching, making your PC more efficient. Right-click Computer, select ‘Properties | Advanced system settings | Performance settings | Advanced’ and select ‘Adjust for best performance of the background services’. Restore the normal setting if apps seem less responsive.Clean up your disk
Removing junk from your drive can improve performance, even if it still has hundreds of gigabytes of free space. Uninstall unwanted programs with Windows or Revo Uninstaller. Likewise, stubborn security programs can be expunged using AppRemover. Next, try Windows Disk Cleanup or CCleaner to remove redundant files. Manually browse the ‘Program Files’ and ‘Windows\Temp’ folders for unnecessary files and folders (only delete what you’re sure is safe to go.) Finally, click ‘Start’ (then ‘Run’ if you’re using XP or earlier), type ‘%TEMP%’ and hit [Enter] to inspect and clear your User Temporary Files folder.
Move your paging file
Relocate the Windows paging file to a second physical drive (not a partition) different to the one that your applications are on to enable your PC to read and write to both simultaneously. This will speed things up noticeably. To do this, right-click Computer, select ‘Properties’ and click ‘Advanced [System Settings] | Performance settings | Advanced | Change’. Clear ‘Automatically manage paging file’,click your current drive, select ‘No paging file’ and then ‘Set’. Next, select the drive you want to use for the paging file, select ‘System managed size’, click ‘Set’, then ‘OK’ and reboot to see the results.Accelerate Explorer
By default Windows XP regularly scans for new network printers and folders, adding anything it finds to My Network Places or the Printers folder. But if you rarely access network resources then this just slows you down. Click ‘Start | Control Panel | Appearances and themes | Folder options | View’, and clear ‘Automatically search for network folders and printers’ to stop it doing so.Remove fonts
Most PCs accumulate fonts over time, reducing performance as your system spends time processing them. It’s a good idea to remove fonts you never use, as long as you’re careful – deleting important fonts can have all kinds of strange effects. Opt for the odd script, foreign or symbol fonts first. If in doubt leave it alone, and copy all your fonts to a back-up folder first so that they’re easily reinstalled.Defrag thoroughly
The regular Windows defrag tool can’t defragment files that are open for exclusive access, which means that your paging and Registry files remain untouched. Fortunately there’s a free tool that can help. PageDefrag runs during the boot process and can defragment these system files without any trouble. It’s also worth trying a commercial app. PerfectDisk delivers the best results in our experience – get the 30-day trial and see how it works for you.
Go for speed over power
Windows Vista’s power options can turn off many optimisations in its effort to save energy, so if you prefer speed then it’s important to confirm you’re set up correctly. Click ‘Control Panel | System and maintenance | Power options’ and make sure you’re using the High Performance plan. Next, click the ‘Change plan settings’ link under ‘High performance’ to make sure that you’re using the fastest option for each setting.Speed up the Start menu
Make Windows open menus more quickly with a quick Registry change. Just go to ‘HKEY_CURRENT_USER\Control Panel\Desktop’, double-click ‘MenuShowDelay’ and change it from the default 400 (milliseconds) to something smaller: 100ms works for us. Restart Windows to see the results.Tune NTFS
If you don’t use old 16-bit software, launch REGEDIT and browse to ‘HKEY_LOCAL_MACHINE\SYSTEM\CurrentControlSet\Control\FileSystem’, then set ‘NtfsDisable8 dot3NameCreation’ to 1. Windows will no longer create DOS-style shortened versions of file names, speeding up file creation. Set ‘Ntfs DisableLastAccessUpdate’ to 1 and Windows won’t update the Last Access date on a folder when you view it, delivering a small boost to drive performance. These options can break older software, so test your PC thoroughly afterwards.Optimise Firefox
Firefox stores its data in self-contained SQLite databases, and these can be compacted in order to recover a little performance. You could do this by downloading the command-line tool Sqlite3 and then using the command ‘for %i in (*.sqlite) do @echo VACUUM; | sqlite3 %i’ to compact all SQLite files in the current folder. However, it’s much easier to install the SQLite Manager Firefox add-on. After you’ve done this, navigate to ‘Tools | SQLite Manager | Database | Connect database’ and browse to one of the large ‘.sqlite’ files in your Mozilla profile. Note its current size, click ‘Database | Compact database’, and check the size again – our ‘urlclassifier3.sqlite’ database dropped by 40MB.Speed up iTunes
Help iTunes run a little faster by disabling features that you don’t use. If you don’t ever look at the Genius recommendations, click ‘Store | Turn off Genius’ to give a small performance boost. If you’re not on a large network or don’t want to share your library, click ‘Edit | Preferences | Sharing’ and turn off ‘Look for shared libraries’ and ‘Share my library’. If you don’t use Apple TV, click the Apple TV tab and clear ‘Look for Apple TVs’. Finally, click the Devices tab and clear any unnecessary ‘Look for...’ options. Large libraries are the main reason for poor iTunes performance. Click ‘Music’ in the Library section, then hold down [Shift] and choose ‘File | Show exact duplicates’ to look for multiple copies of songs. Delete any you don’t need and then browse the library to remove other songs you don’t play any more.
Install only what you need
If you normally select the ‘Complete’ option when you install a program, you might end up with all kinds of features that you never use. Get in the habit of selecting the ‘Custom’ option instead, and pick only what you need.Upgrade your software
UpdateStar (www.updatestar.com) will scan your programs and report any it recognises that have updates available. Installing these should get you bug fixes, more features and better performance. Similarly, DriverMax will identify outdated drivers, then download and install updates.Fix Internet Explorer 8
If IE8 seems very slow and unreliable then your upgrade from IE7 may have broken some DLL registrations. To fix this, open a command window (if you’re running Vista, right-click ‘cmd.exe’ and select ‘Run as Administrator’) and type ‘regsvr32.exe actxprxy.dll’. Press [Enter], then reboot your PC to see if the browser has got any faster.Block Flash applets
Flash applets use up system resources and can slow down your browser. Often these applets take the form of unwanted adverts, so it’s a good idea all round to block them and recover the resources to give improved performance. Firefox users need only install FlashBlock to kill unwanted Flash apps, and if you install Adblock Plus as well, annoying ads and banners will become a thing of the past. Meanwhile IE8 can now selectively block Flash applets, too.Click ‘Tools | Manage add-ons’, select ‘Toolbars and extensions’ and opt to show all add-ons. Double-click the Flash add-on and click ‘Remove all sites | Close’. All Flash applets will now be blocked. However, if an applet is trying to run on a site you trust, click the warning bar, select ‘Run add-on’, add it to your allow list and Flash will be launched automatically on your next visit.Tweak Microsoft Word
Simplify and speed up document displays by using a single typeface instead of many. To set this up, go to Word options, select ‘Advanced’, scroll to ‘Show document control’ and select ‘Use draft font...’. If you’re happy with your spelling, or at least content to check it when the document is done, turn off Word’s AutoCorrect options (in the Proofing section of Options) to save some resources. If you have a fast printer then Word’s default background printing can slow you down (Clear ‘Print in background’ in the Print section of Options). A corrupted or bulky ‘normal.dotm’ template may also negatively affect speeds. To sort this out, lose Word, locate the ‘normal.dotm’ file in your profile and rename it ‘normal.dotm.old’. You’ll lose your custom settings, but it may help to speed up the application. If you find that this doesn’t help, restore the previous normal.dotm to get your settings back.Stop sharing
Windows Media Player’s media sharing functionality can be a real resource hog. To turn it off, right- click the Library tab, click on ‘Media sharing’ and clear the ‘Find media’ and ‘Share my media’ options. Next, launch ‘services.msc’, double-click Windows Media Player, click ‘Stop’ and set its Startup Type to ‘Disabled’ to save yourself some CPU time.Clean your Outlook Inbox
The more messages Outlook stores, the slower it gets, so if you want to improve performance then some pruning is in order. Most email responses contain copies of the original message, so you should be able to delete earlier messages without losing information. Thread Compressor is a free Outlook add-in that will do this automatically. Save All Attachments will save all the attachments in multiple emails, and then remove them.Disable add-ons
Removing unwanted add-ons frees up system resources and can make your apps more stable. In Microsoft Word 2007, click the Word button, then click ‘Word Options | Add-ins’. Choose the type of add-on you’d like to view in the Manage list, click ‘View’ and remove anything unnecessary. Repeat the process in Outlook 2007 by clicking ‘Tools | Trust Center | Add-ins’. In Adobe Reader, click ‘Help’, select ‘About Adobe plug-ins’ and note the filename of anything you don’t need. If you never want to save PDFs to RTF, say, then include ‘SaveAsRTF.API’. Close Reader, go to the plug-ins folder – probably ‘Program Files\Adobe\Reader 8.0\Reader\plug_ins’ – and rename the unwanted plug-ins, for example changing ‘SaveAsRTF.API’ to ‘SaveAsRTF.API.OLD’.
Has your OS installation gone bad? Grab a Live CD and follow our guide to rescuing rogue partitions
When you’re used to the world of Windows or OS X, Linux can seem a little unforgiving. Not only does command-line access hand over the complete keys to the manor to any unwitting user with access to the administrator’s account, there’s rarely a safety net should things go wrong. Despite advances in most Linux desktops (where the ubiquitous Trashcan safely buffers deleted files), you get no such protection from most system-specific configuration, installation and maintenance tools. And while it’s rare for anything to go wrong without your direct input, some accidents do happen, especially if you enjoy tinkering with the latest distro release each month. But this being Linux, there’s plenty you can do to dig yourself out of a hole, which is why it’s always a good idea to have a repair-worthy distribution close to hand when performing configuration and installation tasks.
One of the best developments in recent years has been the Live CD. These offer a fully functional Linux installation that runs from an optical drive. If you’ve got enough memory, you can even install new packages to the RAM disk just as you would when completing a standard installation. This makes a recent release of a Live CD-based installer like Ubuntu Jaunty the perfect system recovery tool. Not only does it include every package you might require, but because it runs from the optical drive rather than the hard drive, your data isn’t touched and there’s no chance files will be overwritten without direct input. It’s the obvious place to start when you get stuck.
Booting Linux
Probably the most common problem is when the Linux boot menu disappears or gets corrupted. The most likely reason for this is that a shared Windows installation has re-stamped its authority over your disk’s master boot record, overwriting the Grub boot loader with its own system-launching code. In these cases, you need to boot into a different Linux environment, either off a Live CD or from any other Linux booting media you can get hold of. The distribution you choose will also need to have Grub installed.
To restore the Grub bootloader to your drive, type root (hd1,0), swapping the drive and partition number with the output you found with the previous ‘find’ command. Then type setup (hd1), swapping ‘hd1’ for your drive number. You should now find that your Linux partition and booting ability has been restored. The only potential problem is that this process could overwrite a Windows bootloader, and if Windows was installed after the original Grub installation, it won’t launch from the boot menu.
Booting Windows
Fortunately, adding Windows to your Grub menu is easy enough, and it’s straightforward to add any other OSes you want to boot from your system if you’ve got an example entry to work from. The key to the boot menu is a file called ‘/boot/grub/menu.lst’, and if you open this in a text editor, you should see that the formatting is relatively easy to understand. For instance, here’s a typical entry for booting a Windows installation off the first partition of the drive:title Microsoft Windows
root (hd0,1)
makeactive
chainloader +1

Restoring the MBR
If you ever need to reinstate the Microsoft Windows bootloader onto your disk’s master boot record (MBR), you can use the Windows rescue disk and the ‘fdisk’ command. However, there’s also a handy open-source utility called ‘ms-sys’ that performs the process from a Linux installation. With the tool installed, typing ms-sys -w /dev/hda will create a Microsoft MBR on the first drive. But this may leave you with the opposite problem to the one we started with if Linux is on the same drive. To resolve it, you’ll need to reinstall Grub to get back to your Linux desktop.
Fixing a partition table
Another situation that initially appears to be catastrophic but can be resolved without data loss is if you happen to destroy the partition table of one of your disks. This is the kind of error that could render an entire disk’s worth of information useless, and it will also prevent your PC booting. But partition tables are stored independently of the data on the disk, and there are ways that you can rebuild them.
The command you need to use is called testdisk. This is one of the most useful commands we’ve ever had to use in an emergency, though it’s not installed on many Live CDs by default. With the latest Ubuntu Jaunty, you’ll need to install it from the Live CD environment using the package manager. After this is done, you should type sudo testdisk on the command line. If you don’t use the sudo command to run with administrator privileges, testdisk will ask for your password when the main page first appears. Before you get to that step, though, you’ll need to let the app know whether you want to create a log file or not. The correct answer is ‘Create’, but most people skip this stage and move straight on to the repair. Before you select the ‘No Log’ option, just remember that a log file can really help if testdisk fails or makes the problem worse. It’s the only way that you’ll know how far the along the process the repair procedure managed to get before it stopped, and where any fatal errors might have occurred.
Writing the new table
After choosing whether or not to create a log file, the next screen you’ll see will list the storage devices attached to your computer. The size of each disk should be correct, along with the unique identifier for the drive at the end of the line. Use the cursor keys to select the drive that you want to repair and press [Enter]. The screen that now appears is the most important, because you need to give testdisk some indication of the type of drive partition used on your system. In the vast majority of cases, this is going to be the first option – an Intel/PC partition. If you’re using a system other than this, then there’s a good chance you’ll already know what it is. You may be using the ultra-new EFI standard, for example, and this can be selected from the list.
From the page that lists the discovered partitions, make sure that the general parameters are correct – such as one of them being labelled as bootable – and press [Enter]. From this file list of partitions, select ‘Write’ to make the list of partitions you can see on the screen permanent. After a system reboot, you should find your drive fully restored, although there’s a chance you might need to install the Grub bootloader.
Back up your data
Before you start messing with your drives in an attempt to rebuild a working system, make a copy of the data on the drive. There are many ways of making a backup in Linux, but the easiest is to use the ‘dd’ command. This makes a bit-for-bit copy of what’s on your drive, creating the Linux equivalent of a disc image. This means that you can work on this image to restore lost or deleted files without even touching the original disk. The ext3grep command we talk about in the ‘Restore deleted files’ box can use the output of ‘dd’ as its raw input, for example. Unlike ext3grep, ‘dd’ is easy to use. Just execute the command with a source followed by a destination: dd if=/dev/sda1 of=sda1_image.bin, for instance. The only caveat is that ‘dd’ will do exactly as you ask, overwriting anything it finds without any pleasantries. This is a big cause of overwritten boot blocks and MBRs on Linux. The command is also difficult to use because there’s next to no output to tell you what it’s doing, and it can take a while if you leave the block size at its default value. Sometimes the only way you can make sure ‘dd’ is making a copy is to check that the activity light is flashing.Solving Error 18
One of the more problematic Grub errors is Error 18. It’s a throwback to a time when BIOSes couldn’t detect the size of a large drive properly. There are a couple of solutions to this problem. One is to try changing the drive order in the BIOS; the other is to create a smaller root Linux partition on the drive, as partitions over 500MB in size have been reported to cause the problem with certain BIOSes.Restore deleted files
Thanks to the way modern Linux filesystems like ext3 use a journal to document file management, there’s no ‘undelete’ command that can simply restore lost and accidentally deleted files. Instead, you’re often left to trawl through the raw blocks of code accessible through the device nodes on your filesystem. But that hasn’t stopped some developers from trying to replicate it. One developer was particularly flummoxed when he accidentally deleted his home directory. Almost a year of work went with a careless execution of the ‘rm -rf’ command. But rather than spending the next few weeks lamenting its loss at a local bar, he spent them creating a tool to restore all those lost files. That tool is called ext3grep, and it’s about as close to an undelete command that us Linux users will ever get. But be warned: the price you pay for file resurrection is complexity.Ext3grep is likely to be hosted on your distribution’s package repository. Before using it, you’ll need to make sure no processes are accessing files on the partition that held the file you want to recover. It might be easier to simply reboot to a fail-safe or administration mode, or even a Live CD if you need to get at the root filesystem. You then need to use ‘ext3grep’ to search for the missing file. The easiest method of recovering a file called ‘test.odt’ on ‘/dev/sda1’, is to type ext3grep /dev/sda1 --recover-file test.odt. Ext3grep will then search through each block of the device looking for directories, before diving in and looking for references to your file. If it can be found, it will be placed in the RESTORED_FILES folder.
Windows 7 has been making headlines for a few months now. You might think that you know about all that it contains: new touch screen features, a revamped taskbar with larger thumbnail previews, Internet Explorer 8, easier networking and so on.
But, Windows 7 is packed with new developments – it’s just that most people aren’t talking about them.
Features you didn’t know About Windows Seven
- Keep your PC clean
- Restrict other users
- Action Center
- Tone down UAC
- BitLocker to go
- ‘Run as’ returns
- Find and fix problems
- The Problem Steps Recorder
- Extended System Restore functionality
- Discover bottlenecks
- DIY system discs
- Faster IE startups
- Simultaneous disk defrags
- Multithreaded Robocopies
- Search connectors
Yes I know, I also didn’t understand the the List. So you need to Read the post below in case you want to know details of the features. It will be a bit boring. Lot of Technical Terms. But very good resource for geeks

30 Things You Need To Know about Windows 7 – Read the full Read Full Post.
The Seven Remix XP application was designed to improve the Graphical interface of your Windows XP. A great part of the resources of your system files are replaced with files that contain icons, images, animations that are extracts of Windows 7.
Tip : What’s New in Windows 7 – 15 Latest Features
The result obtained, is therefore a improved Windows XP which looks like seven.

The installer automates the process of substitution of system files. It applies adjustments in the registry, it installs programs of third, skins and visual extras like sounds, styles, etc. In addition, it makes a backup of its archives in case that it needs to recover them.

> Download Seven Remix XP : Link
Btw, this process might be a bit bulky .. so make sure you have atleast a GB of ram. Very good application for getting the looks of widows seven in XP.

Free Softwares to Change Wallpaper Automatically
# DesktopSlides Free Desktop Wallpaper Changer
DesktopSlides is a user friendly and resource friendly desktop wallpaper changer for windows.

You can set DesktopSlides to change your desktop wallpaper at a predetermined time interval (e.g. every 10 sec) and customize the wallpaper position (tile, center, fit to screen) easily.
> Download DesktopSlides : Link
You can also load wallpapers filtered by your display ratio or screen resolution.
# Wallpaper Master
Wallpaper Master is a powerful and highly customizable desktop wallpaper manager and cycler. It will automatically change your background wallpaper with a huge range of options, and is great for indexing large collections of personal photos or any kind of image.

You can create your own categories using images on your computer, and it will cycle through your images automatically in whatever order you specify: in a shuffle mode, listed order, or based on your personal ratings.
> Download Wallpaper Master : Link (759KB)
The program also has auto-size options to make sure your images are displayed with optimal size.
# BioniX Desktop Wallpaper Changer
BioniX Desktop Wallpaper Changer is the most popular desktop wallpaper changer/wallpaper manager for Windows.

It is FREE and jam-packed with features that no other free wallpaper manager can offer!
> Download BioniX Desktop Wallpaper Changer : Link
The size of the package is about 6MB and includes a bunch of some nice wallpapers.
MappedUp takes the form of a free Screensaver, active desktop, or website widget that displays items from RSS news feeds overlayed geographically on a world map in real time.
The news items are shown as either clickable bubbles or little dots that light up on the map itself and display a tooltip/popup window when moused over (check it out in action here).
I have never been one to seek out screensavers, but every once in a while I find a cool and/or interesting one that I like for example MappedUp. for me falls in that category. Note that while thescreensaver is only one of three of this program’s features, I did try the active desktop part

Here are some Features :
- This program does not function as an RSS reader instead it allows you to choose up to 5 of its pre-defined RSS feeds as well as up to 5 general tags/categories (e.g. News, Technology, Internet, etc.) You can easily submit a feed to be included in their feeds list, though.
- The screensaver is my favorite; allows you to use the mouse to interact with the map without closing down the screensaver (press any key on the keyboard to dismiss the screensaver). Looks really cool.
- You will need to set up an account at the MappedUp website in order to use the service and be online while using the screensaver.
Link : Download MappedUp
This program scores high in the coolness department. It is more of a toy than a tool to deliver information at your fingertips.

Though there are better notepad alternatives but the windows notepad is popular because of its simplicity.
Easy & Amazing Notepad Tricks – Top 5
Here are some really amazing notepad tricks which you can see in the windows notepad. Check them out right away.
#1 Bush Hid the Facts – Most Popular Notepad Tricks
This is one of the mysterious notepad tricks we know. According to the trick it really seems Microsoft had put some hack into the coding of notepad making the text hidden after saving it.
Open notepad.
- Type BUSH HID THE FACTS
- Save that file.
- Close it
- Open It Again See…
Why This Happens ? : It was later known 4335 Rule. It means that if we enter four words separated by spaces, wherein the first word has 4 letters, the next two have three letters each, and the last word has five letters. ThenNotepad Automatically hides the text into unknown code. Similar are with " this app can break".
#2 World Trade Centre Attack Trick – Shocking Notepad Tricks
Did you know that the flight number of the plane that had hit WTC on 9/11 was Q33NY …
- Open your Notepad
- Type the flight number i.e Q33N in Capital Letters.
- Increase the Font Size to 72
- Change the Font to Wingdings
You will be amazed by the findings. Its a Plane going for 2 building shaped structures & then death.(see below) WTF ?

Shocking … Ya …But this is a complete hoax… because I researched myself on Wikipedia and found that None of the planes involved in the 9/11 attacks had theflight number "Q33 NY". The flight numbers of the planes that crashed into the Twin Towers were in fact "11" and "175". Clearly, someone has simply made up this supposedflight number in an attempt to make the spurious claim seem valid.
#3 Famous Matrix Falling Code Effect – Cmd Notepad Tricks
In this video youtube user Z3AI0T teaches you how to create that famous "matrix falling code" effect using notepad and cmd.
The Video Creator has some more similar notepad hacks… visit his/her channel to get them.
#4 Make a Personal Log-Book / Diary with a Notepad Trick

- Open Notepad and type .LOG and press enter.
- Now Save it with any name.
- After saving, Close it and Open it again.
Surprisingly you can see the current date and time being inserted automatically after the .LOG line. This will happen automatically every time you reopen the thenotepad file.
Subscribe to:
Posts (Atom)


